The Silk Press Guide
Technique for Stylists
Ten steps from consultation to aftercare, built to scale to the hair in the chair rather than one fixed temperature and pass count. None of it overrides your own training or judgment.
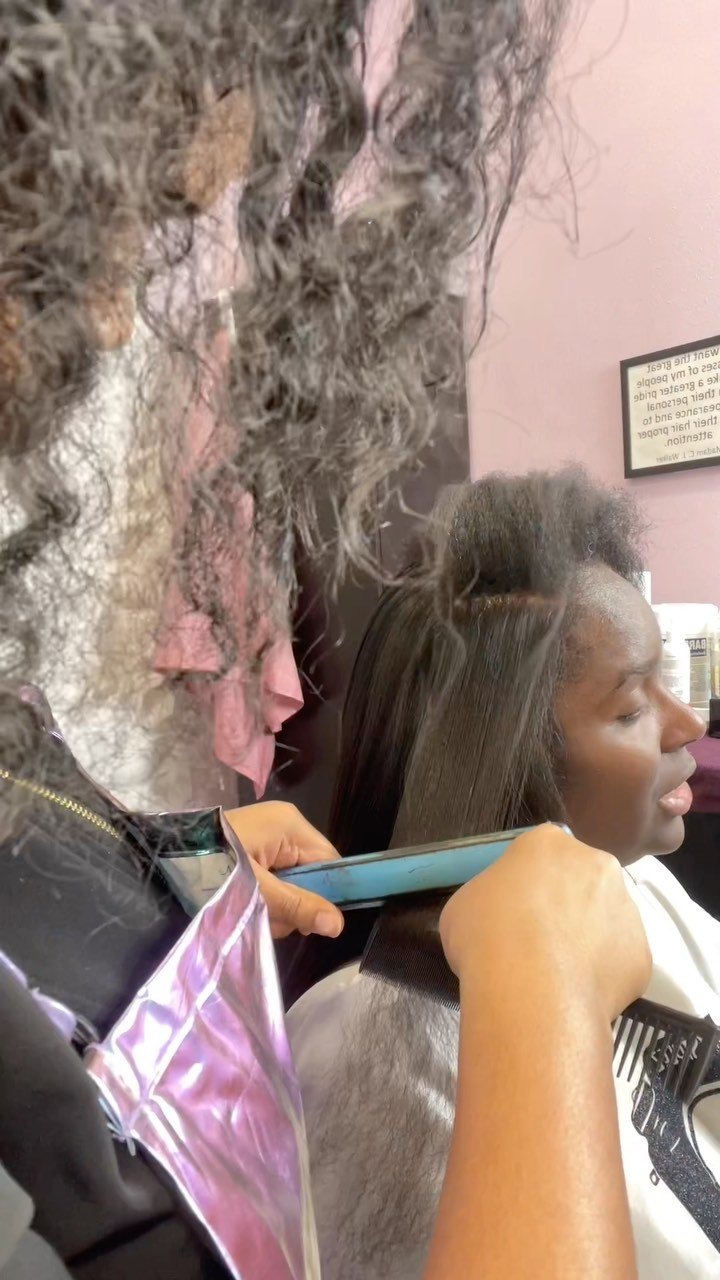
The Framework
Ten Steps to a Professional Silk Press
Tap a step to open it. Every step is listed below in order, with the most important warning sign called out separately.
Step 01 of 10
Start every appointment by talking through the client's hair history: recent color services, chemical treatments, heat styling frequency, and any breakage or sensitivity they have noticed. This conversation shapes every technical decision that follows, including temperature, tension, and product selection. Ask about the timeline for the style too, since a press that needs to last through a week of humid weather calls for different choices than one meant for a single event. Listen for details the client might not think to volunteer, like a recent box color or a relaxer touch-up from months ago. A thorough consultation up front prevents most of the avoidable problems that show up mid-service.
Watch ForSkipping straight to the shampoo bowl without asking about recent chemical services, then discovering mid-press that the hair cannot tolerate the planned settings.
Before any product or heat decision, physically assess the hair. Check porosity by observing how quickly a strand absorbs water or product, check density by parting several sections and gauging how tightly packed the strands are, and check elasticity by gently stretching a dampened strand to see how it responds and returns. These three factors, more than any single rule, determine what temperature and pass count the hair can actually tolerate. High porosity hair generally needs less heat and fewer passes, while low porosity, denser hair often needs more time and slightly higher heat to get the same result. Write these observations down if you are building a client history, since porosity and density can shift over time with new services or seasons.
Watch ForRelying on how the hair looks dry, rather than actually testing porosity and elasticity, and misjudging what the strand can handle.
Match every product choice to what the diagnostic assessment revealed. High porosity hair often benefits from a slightly heavier leave-in or moisture-sealing step before heat protectant goes on, since it loses moisture faster under heat. Low porosity hair can end up coated and weighed down by the same heavy approach, so lighter, more penetrating products tend to work better there. Density affects how much product is actually needed overall, since a denser head requires more coverage to protect every strand evenly. Take the time to adjust rather than defaulting to the same routine for every client regardless of what the hair actually needs.
Watch ForUsing a one-size-fits-all product routine that ignores what the porosity and density assessment just showed.
Decide how the head will be sectioned based on density, texture, and any problem areas identified during consultation, generally keeping subsections in the range of a quarter inch to half an inch, thinner for coarser or more resistant textures. Even, consistent tension across each section matters more than how hard the iron presses down. Hold each section taut but not strained, angling it so the iron makes full contact along the length rather than skimming one side. Pay particular attention to the nape and crown, which are easy to underserve simply because they are harder to see and reach. Section geometry decided here determines how even the final result looks far more than any single pass technique does.
Watch ForDefaulting to thick, fast sections to save time, which trades a quicker service for a patchier result.
Rather than using one fixed temperature for every client, scale the setting to what the diagnostic assessment supports. A commonly used professional range runs from roughly 300-350 degrees Fahrenheit for finer, higher porosity, or previously compromised hair, up to 350-400 degrees Fahrenheit for coarser, lower porosity, more heat-resistant hair. Pair whatever temperature is chosen with one to two controlled passes per section as the target, increasing time spent per section rather than heat or pass count if more smoothing is needed. Reassess as you move around the head, since texture and porosity can vary meaningfully from one area to another on the same person. Treat this as a framework to reason through, not a fixed number to apply blindly.
Watch ForSetting the iron once at the start of the appointment and never adjusting it as different sections and textures come up.
Color-treated hair, especially hair that has been lightened, has a compromised cuticle that cannot always tolerate the same heat as untouched hair, even if it looks and feels healthy. Chemically relaxed hair carries its own history of processing, and combining two chemical or heat services close together raises the risk of breakage substantially. Lower the temperature range for both of these categories and lean on additional passes at a gentler setting rather than a single hotter pass. Ask when the last chemical service happened, since hair processed within the past few weeks generally needs the most caution. When elasticity testing shows poor rebound, treat that as a signal to scale back regardless of what the client requests.
Watch ForApplying standard settings to recently colored or relaxed hair because it looks visually similar to untreated hair.
Hair that already shows signs of heat damage, such as uneven texture, dullness, or a rough feel along the length, needs a plan built around minimizing further stress rather than achieving maximum smoothness in one visit. Fine or fragile hair falls into a similar category, since it has less structural mass to absorb heat safely compared to coarser strands. In both cases, favor lower temperatures, fewer passes, and slower, more deliberate technique over speed. It is reasonable, and often the right call, to tell a client that a fully smooth result today would come at too high a cost and that a gentler partial result is the better trade. Document these cases so future appointments start from an informed baseline instead of relearning the same lesson.
Watch ForPushing for a fully smooth result on visibly damaged or fragile hair instead of adjusting the goal to match what the hair can safely tolerate.
Move the iron at a steady, unhurried pace through each section, letting the heat do the work rather than compensating with pressure or speed. Keep to the one to two pass target established earlier, and if a section is not responding, stop and reassess dryness and tension before reaching for a third pass. Rotate the iron slightly as needed to maintain full plate contact along the section rather than repeatedly catching the same edge. Watch and listen for warning signs like a burning smell or visible steam, both of which mean something upstream, usually moisture or temperature, needs correcting before continuing. Consistency section to section matters more than any individual pass being perfect.
Watch ForDefaulting to a third or fourth pass out of habit instead of diagnosing why the first two did not fully smooth the section.
Once every section is pressed, let the whole head cool for several minutes before final styling, since hair is more prone to reverting or frizzing while still warm. Use this cool-down window to check for any missed spots, particularly at the nape and crown, and address them with a single light pass rather than reworking the whole area. Style as desired once the hair has fully cooled and settled. A finishing product applied lightly at this stage can add shine without weighing the hair down or contributing to buildup at the next wash.
Watch ForStyling or brushing through sections immediately after pressing, before the hair has had time to cool and set.
Walk the client through what to expect and what to avoid before they leave the chair. Explain that moisture, including humidity, sweat, and water, is the main threat to how long the style holds, and that avoiding it for the first 24-48 hours will meaningfully extend the result. Recommend a silk or satin covering for sleep every night, not just the first one, and suggest they return for a refresh or checkup in roughly 7-10 days if they want to maintain the style rather than let it revert naturally. Answer any questions about their specific hair type honestly, including realistic expectations about how their particular porosity or density will hold up. A client who understands the aftercare is far more likely to get the full value out of the service.
Watch ForHanding over generic care instructions that do not account for what was actually observed about this client's hair during the appointment.
Talk Shop
If you are a stylist with questions about this framework, or you want to compare notes on a specific texture or technique, KodakStylez would genuinely love to hear from you. Reach out through the contact page and let’s talk shop.